
Free Educational Resources for Schools
"The learning experience for every child was fantastic and the intended learning outcomes and more were achieved!"
-Camp Feedback
One of the best ways of ensuring lasting impact from any residential experience is to build what the children learn and experience into your school life. This page has free resources for you to use, along with ideas for how to integrate your camp into your classroom environment.
Our camps are validated with the Children’s University. Please contact us for our code so that your students can add their learning to their Children’s University Online Account.
Contents
Click on a subject to be taken directly to that area.
Before Your Camp
Lesson plan ideas for before we visit.
Downloadable Resources
Copies of the resources we use for delivering our camps.
Follow Up Lessons
Lesson plan ideas for after your camp.
Copyright
We put a lot of work into making the resources we use for our camps and upload them here for the schools we work with to use in any way they like.
However, we are also very happy for other schools, charities and even commercial organisations to make use of our resources. We just ask that you leave them unmodified, give credit to The Outdoors People, and provide links back to our website on your website.
We also have some further resources aimed at other outdoor education providers that you are welcome to edit, including by removing our branding and replacing it with your own. Click or tap here for these.

Unless otherwise stated, this work is licensed under a Creative Commons Attribution-NoDerivatives 4.0 International License.
Before Your Camp
Involving your children in the planning for your camp can give opportunities to increase excitement, encourage high participation, and teach lifelong learning. Some ideas might be:
Campsite planning. Our tents are roughly circular, are 5 metres wide, and have metre long guylines on all sides. How much area do we need for each tent? We usually set our tents up in a “horseshoe”, with the doors pointing inwards and the open side of the arc facing towards the part of the school building the children will use during the night. We try not to put the tents too close together if the space allows. How much area will we need for the full camp? Could you blow up a satellite photo of the school or a section of Ordnance Survey map and plot it out? The children might need to measure a known distance on the school site so you can calculate the scale of your print out. If we haven’t camped with you before, prepare them for the fact that the layout might be slightly different to what they planned!
Choosing activities. Involving the children in planning their camp can be very exciting and instil a sense of ownership over their experience. You may want to pre-choose some activities, or you might want to give the children free-reign. If in doubt, we recommend our Bug Buns and Blazes, Water Purification, and Crash and Carry activities, along with one other of your choice. All of our activities are “challenge by choice”, so if there’s a specific element some children aren’t comfortable with – such as eating bugs – no one is going to force them and there will still be lots of other fun things to do during that session. It’s important that this is a teacher lead session to avoid some voices being drowned out and we advise against using a “democratic vote” as that can leave minorities who feel strongly about a particular choice with no voice! You can learn more about our activities and download a sample programme here.
Meal planning. Could the children be involved in planning and budgeting for your meals? They’ll need to consider dietary requirements and note down what everyone chooses. Did they remember teachers and our staff? Could they give the order to your catering provider themselves?
Choosing names and making sign posts for tents. Once you’ve selected which children will be sharing tents, they could choose names for their groups and make laminated signs attached to gardening canes, or held onto a guyline with bulldog clips. You could select a theme for the tent names based on your current areas of studies or books you have read in class recently. You can use our tent list to help you plan which students will be sharing a tent which can be found on our Information and Downloads page.
Risk assessment. Learning how to manage risk and an understanding of how to balance a risk with the rewards of an activity are very important life skills, so this makes for an excellent guided classroom lesson before a camp. Involving the children in the risk assessment process can also improve buy-in if you expect to have a control measure that will be inconvenient for the children – such as an off-limits area of your site or a “buddy system” for going to the bathrooms during the night. Children have active imaginations so it’s important to guide the topics discussed using the same kind of subject headings as will be in your official document. You might want to avoid some topics to avoid scaring more nervous campers. Click here to view our guidance on writing your risk assessment.
Food tasting. If we are running our Camp Food activity for your evening meal, you can ask us to send you some samples of popular options to try in school. A kettle, some spoons, and carefully reading the instructions is all that’s needed for preparation!
Designing your flag
You will receive your blank flag in the post about one month before your camp, this is for the children to decorate ready to raise high above the camp during our opening ceremony. When choosing paints, please remember that your flag may get rained on – permanent markers can be a good choice! Some ideas for decoration might be:
Having the children draw a design for writing their own name on a piece of paper. This can then be traced onto the fabric.
A quick option can be having the children draw round their hands and writing their name in the space created.
You could have the children draw and colour a variant on your school logo or class names.
You could look at “real world” flags and have the children come up with their own design. Why are real world flags the colours and patterns they are? Are there similar symbolisms the children could include in their design? This activity could be linked to the geography curriculum. There’s lots of vexillography (flag design) resources on the internet.
Wellbeing
Lots of studies have been done on residential activities and their impact on children and young adults. Could your children gather before and after data or testimonials on the effect of their camp?
Should the questions the children are asking be partly of fully anonymised? Why?
Perhaps they experienced anticipation, excitement, anxiety, or fear beforehand? How did the camp change that? Would they feel the same way if they were going to camp with us a second time?
Do they feel more positive and confident about future residential opportunities that might take them elsewhere?
Do they feel it increased their resilience, confidence, happiness, or the strength of their friendships? Why?
How do children in the lower years feel about their future camp after seeing one happening?
Group T-shirts
During the day, the children will spend a lot of time in Activity Groups of around 15 children. A few packs of coloured t-shirts, allows you to quickly differentiate between the groups and the children can decorate their t-shirts as a classroom activity – be aware that permanent marker will “bleed” through fabric, so you will want to protect your tables! You can contact us to confirm how many Activity Groups your programme will have.
Sleep mask making
As anyone who has camped regularly can tell you: you always wake up when the sun comes up! A fun and practical sewing project for the children would be making their own sleep masks so they get a few more ours of darkness. With felt lining for comfort, these can be simple to make and engage the children with the idea of getting a good nights sleep so they can better enjoy their camp. Decoration can range from patterned outer fabric, to animal masks!
Key Stage 2 Curriculum Links
We work hard to link all of our educational and exciting activities to the National Curriculum. To see how our camps work with the Key Stage 2 Curriculum, click here, or download the document by clicking here.
Resources And Downloads


RESOURCES
Click here to download The Outdoors People Campfire Song and Story Book
Click here to download our Improvised Shelters booklet
Click here to download printable crib cards on finding north using a clock
Click here to download printable crib cards on finding north with a shadow
THE HIGH FIVES
Helpful
Involved
Good Listening
Happy
Fun
Ideas
Valuable
Encouraging
Singing
The High Fives can be downloaded here.
THE TENT RULES
No stepping on the tent.
No shoes in the tent, no socks out of the tent.
Open all 3 zips to get in and out.
No running near camp.
AND ALSO:
No swinging on the poles.
Always close the doors when you leave the tent.
No food or drink in the tent.
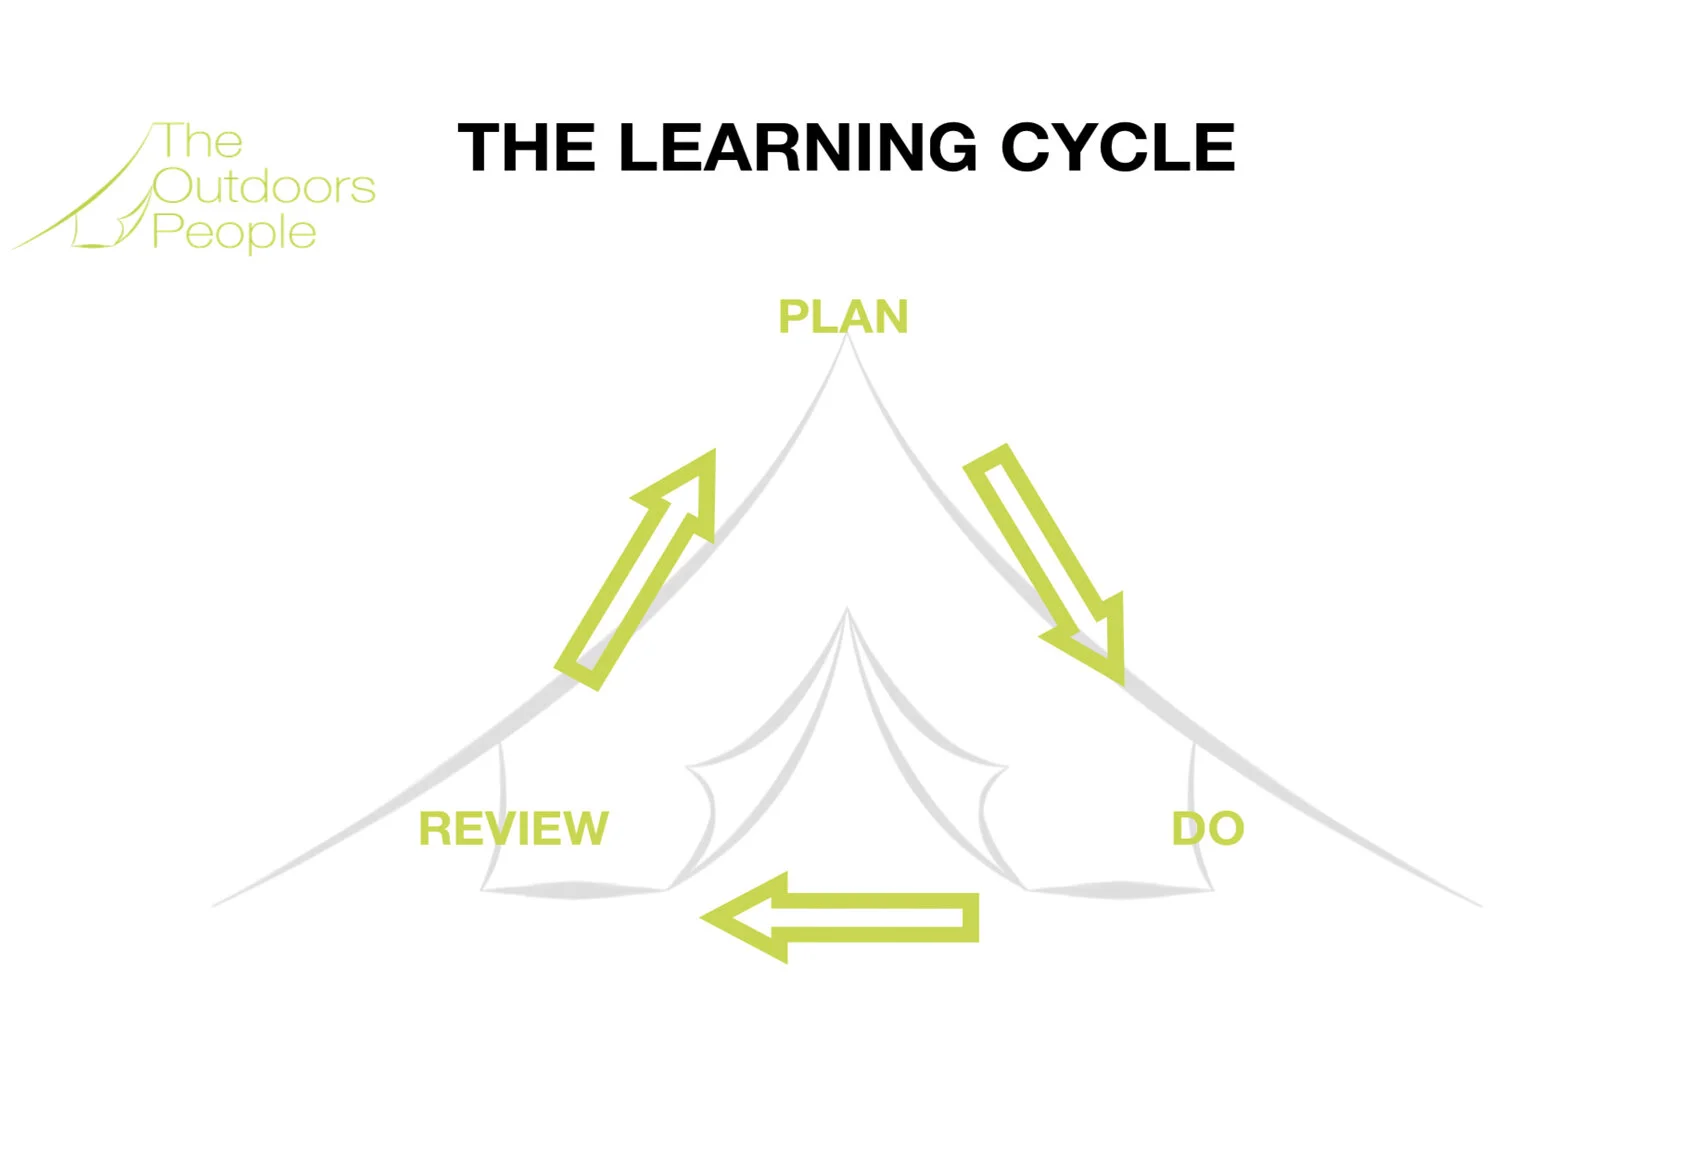
Follow Up Lessons
Building what the children learn and experience during your residential into your school life can create lifelong learning and lasting impressions.
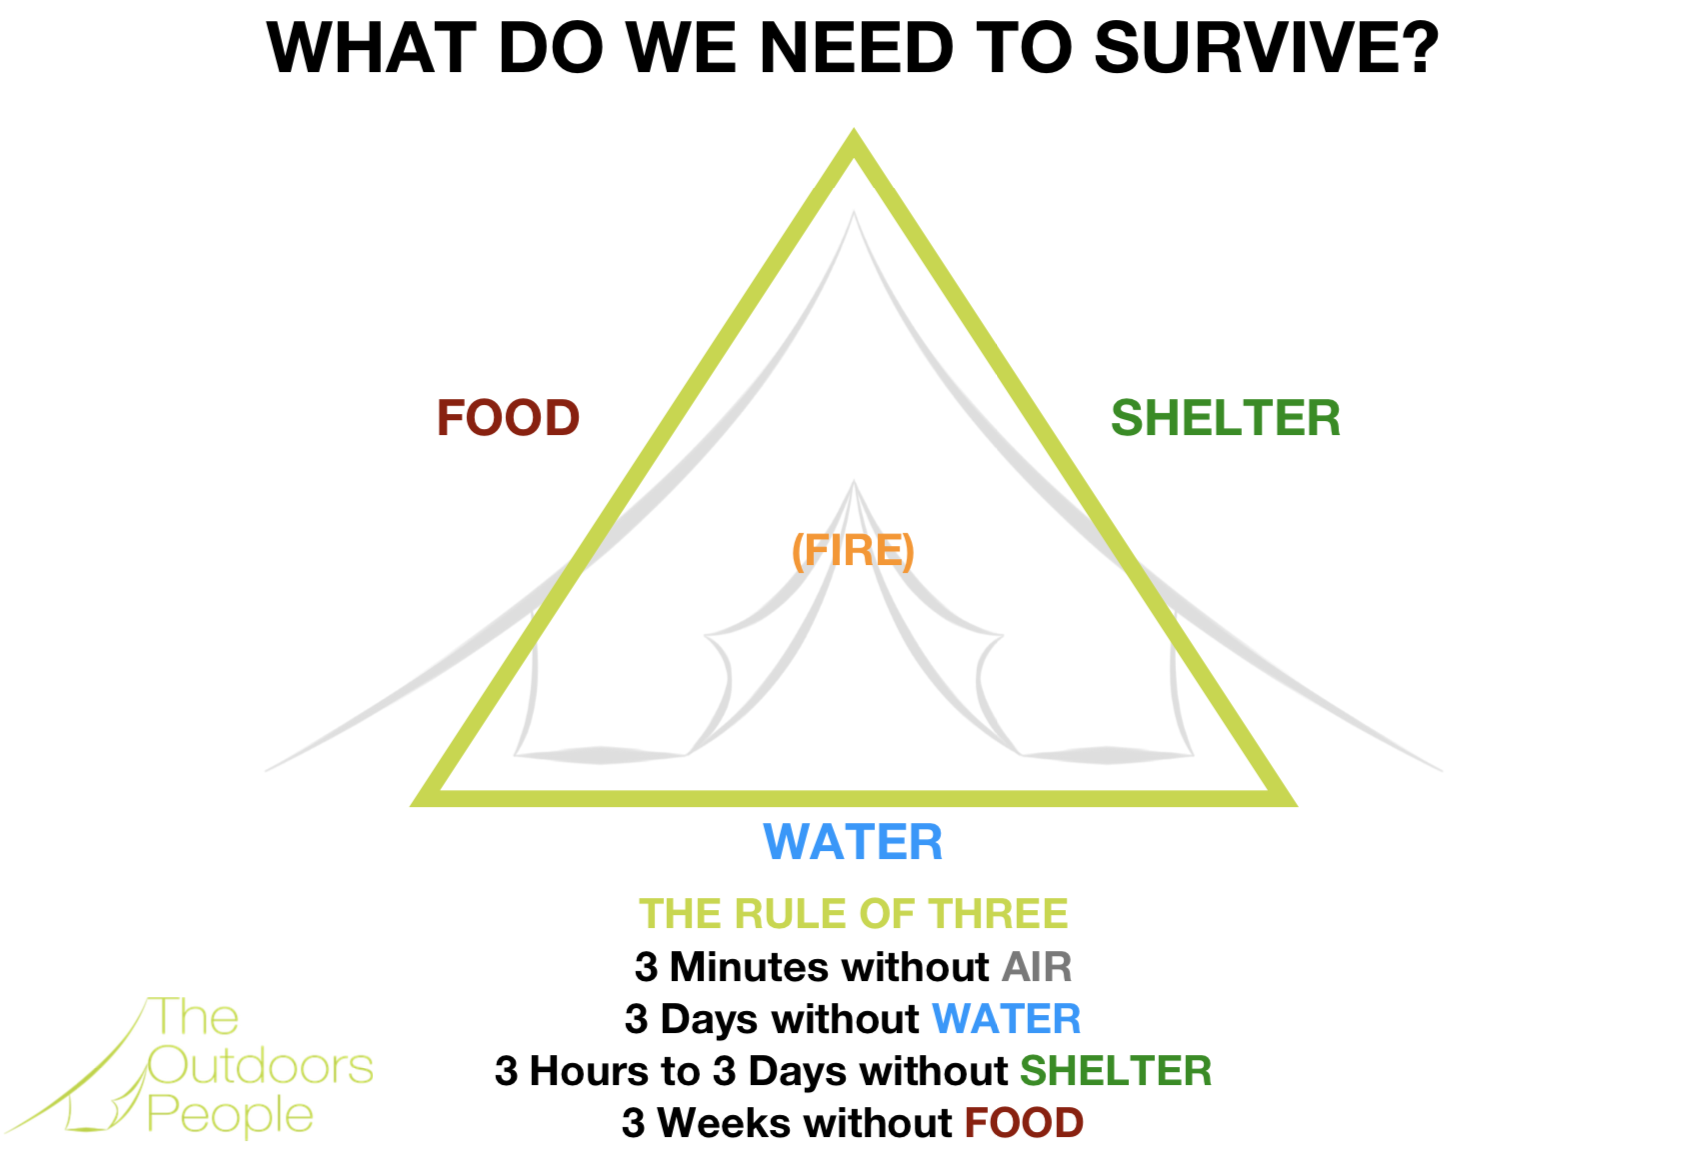
Shelter is one of the three things the children learned about on the Survival Triangle. At it’s most simple, shelter simply protects us from weather that might do us direct harm. What else is good about shelter? Might it help us sleep? May we be able together by on fewer calories and less water if we are in an environment that is the right temperature for us? Might it be good for our emotional wellbeing? Some shelters might protect us from other types of harm. What does the lock on your house protect you from? What does the drawbridge on a castle protect you from? What do you think the effects might be on a human who has to go a long time with inadequate shelter?
The canvas bell tents we use on our camps have a storied history. Similar to the yurts, tipi’s and lavvu and countless other amazingly designed variations used by native people’s around the world, more portable canvas version have been in military use since at least 600AD. More modern designs were made in the 1800’s and can be seen in images of Sir Ernest Henry Shackleton’s antarctic expeditions of the early 1900’s. What else can the children learn about the history of bell tents and similar traditional designs?
Are there other famous groups or individuals who have lived in tents?
Who in the modern day might live in a tent some of the time and why? Who might live in a tent all of the time and why?
Some shapes have very high volumes when compared to their surface areas. In tent design, this means you can get a larger internal space while carrying less weight. What shapes have a good area to volume ratio? Why might some of these shapes be better for making a tent?
When packed, our tents are 110cm long and 40cm wide. What is their packed volume?
The floor of our tents is a circle that is 500cm in diameter. How much area is this? How much area did you have per-child in your tent?
When pitched you can think of our tents as two 3D shapes stuck together:
A cylinder that is 50cm tall and 500cm wide
And a cone that is 300cm tall and 500cm wide at the base
What is their pitched volume? How does it compare to their packed volume?
Some shapes – like domes – meet all the criteria for a good tent shape but were used less commonly in history. What is it about modern flexible tent poles that has caused these shapes to be used now, when they often weren’t historically?
Site Enrichment
Our in-school residentials give your children a new perspective on your site. After your camp, they may be excited to learn more about your grounds or to look at plans for improving it! Here’s some ideas:
A clean up afternoon! Litter picking, putting down new bark on paths, and weeding the flower beds.
Redecorating! This could be simply repainting a fence or it could be something more creative and colourful.
Create a wildflower meadow. Pick an area where the grass can be allowed to grow longer and get in some seasonal seeds that the children can see blossom soon, along with some annual seeds that should come back each year. This is a low cost session that is great for biodiversity! For a balance between appreciating and protecting the space, we recommend allowing children to spend free time in the meadow but not to play games there.
Tree planting. Many of the sites we visit don’t have a lot of space suitable for shelter building! Having the children plant a small number of native or fruit trees is a great way of improving biodiversity, learning more about habitat and food provenance, and improving your site for the long term.
Creating seating areas. Older children could make a project of observing your site during free time to see where children (“site users”!) naturally congregate as well as considering “desire lines” that shouldn’t be obstructed, combined with calculating the area that would be taken up by seating areas in maths class. Pre cut wood rounds are something they could help unload from a vehicle and then roll into place. These can then be left free standing so children can move them around as they wish, or can be staked in place – something the children could help with under proper supervision. Some companies may be happy to chainsaw a section of the log while the children watch from a safe distance.
Set up a trail camera. During our camps on school sites, we’ve seen hedgehogs, ducks, foxes, owls, red kites (and lots of cats). Perhaps something fascinating visits your school grounds as well? Talk to local wildlife charities to see if they can loan you the equipment and help you decide where to put it and then spend time learning about what you’ve spotted.
Local Adventures
You don’t get much more “local” than camping at your own school. A great project can be researching what other exciting things there are in the local area, followed by an adventurous day or half day trip to a free local venue. Wildlife reserves, forest and heathland, reservoirs, and more can all expand a child's horizons and help install a sustainable love of the outdoors. You can involve the children in the planning, such as budgeting for the travel, figuring out the local bathroom facilities from public resources such as ordnance survey maps, and they can even help with the risk assessment process.
Displays and Presentations
Many of our schools go on to create a wall display about the experiences the children had on their camp. Your decorated Camp Flag can make an amazing centre piece for a display and you can include drawings or creative writing by the children about their experiences. This can also be a great opportunity for the children to review the huge amount of learning that takes place on their camps by making copies of the educational resources found on this page or maybe making something even better!
The end of one camp is a great time to start exciting younger year about future camps with us. Some of our schools have the children write letters to other classes about their experiences or even lead a school assembly.
First aid
PSHRE
First aid is a vital survival school and an important part of the PSHE curriculum. During our camps, the children learn some basic first aid principles during Crash and Carry. Super-Medics have great resources for teaching first aid to children. First aid practice is a great opportunity to take study out of the classroom and back into your school field. You could consider pairing this learning with a visit from the local fire or ambulance services. In some regions, hill and moorland rescue, cave rescue, coastguard or mountain rescue services might be able to come in and talk to the children about their work and how to stay safe.
Water Purification

Water Purification
During a water purification session, the children will build a water filter to clean extremely muddy water and then boil it to make it safe to drink. They will advance a number of social and personal development outcomes and also learn about:
The three things that can make water unsafe to drink and how to remove them:
Solid materials (“sediments”) that could hurt you, like soil or twigs, can be removed by passing them through the layers of a filter, in this case, gravel, a thick layer of sand and kitchen roll. The water must be visually completely clear before moving on to the next step and can be put back into the filter several times if required.
Harmful chemicals (“contaminants”) can be removed by filtering the water through crushed charcoal or activated carbon. They will learn that charcoal is made out of carbon and learn that carbon is a very "grabby" material. They also learn about carbon as part of the fire triangle in "Bug-Buns and Blazes!" and "Friction Firelighting." Though readily available in a survival situation, crushed charcoal is not as effective as activated carbon so care must be taken to avoid water that might be heavily contaminated.
Bacteria and harmful other living things (“pathogens”) can be killed by boiling the water for two minutes – boiling times should be increased at high altitude.
Areas of learning that could be expanded upon in a classroom environment might include:
Water Treatment in the UK (possibly combined with a visit to a local site)
Drawing diagrams of the filter and journaling the process used
The water cycle
Microorganisms
Water supplies in developing economies (hand-to-mouth existence, lack of resources, lack of formal education) and discussion about how the Survival Triangle might be viewed differently post industrial economies.
There are other methods of filtering or sterilising water that you could research. (If you’re planning on trying these, please be aware that each technique is usually only one part of a multistep process to remove sediments, contaminants, and harmful pathogens).
Silver nano particle filtration
Copper coating
Copper zinc electrolysis
Chemical purification (chlorine, iodine)
Microfiltration
Ultraviolet light/radiation
Review the Fire Triangle
More about carbon, how it's a building block of life and why that also make it good for filtration of dangerous chemicals
During a Bug-Buns and Blazes session, the children will take part in a number of personal challenges and:
Learn about the fire triangle of
Fuel (carbon)
Air (oxygen)
Heat
Take part in the bush-tucker challenge and learn about:
The varied cultures that eat insects regularly
Global food security and the role that insects might play in that
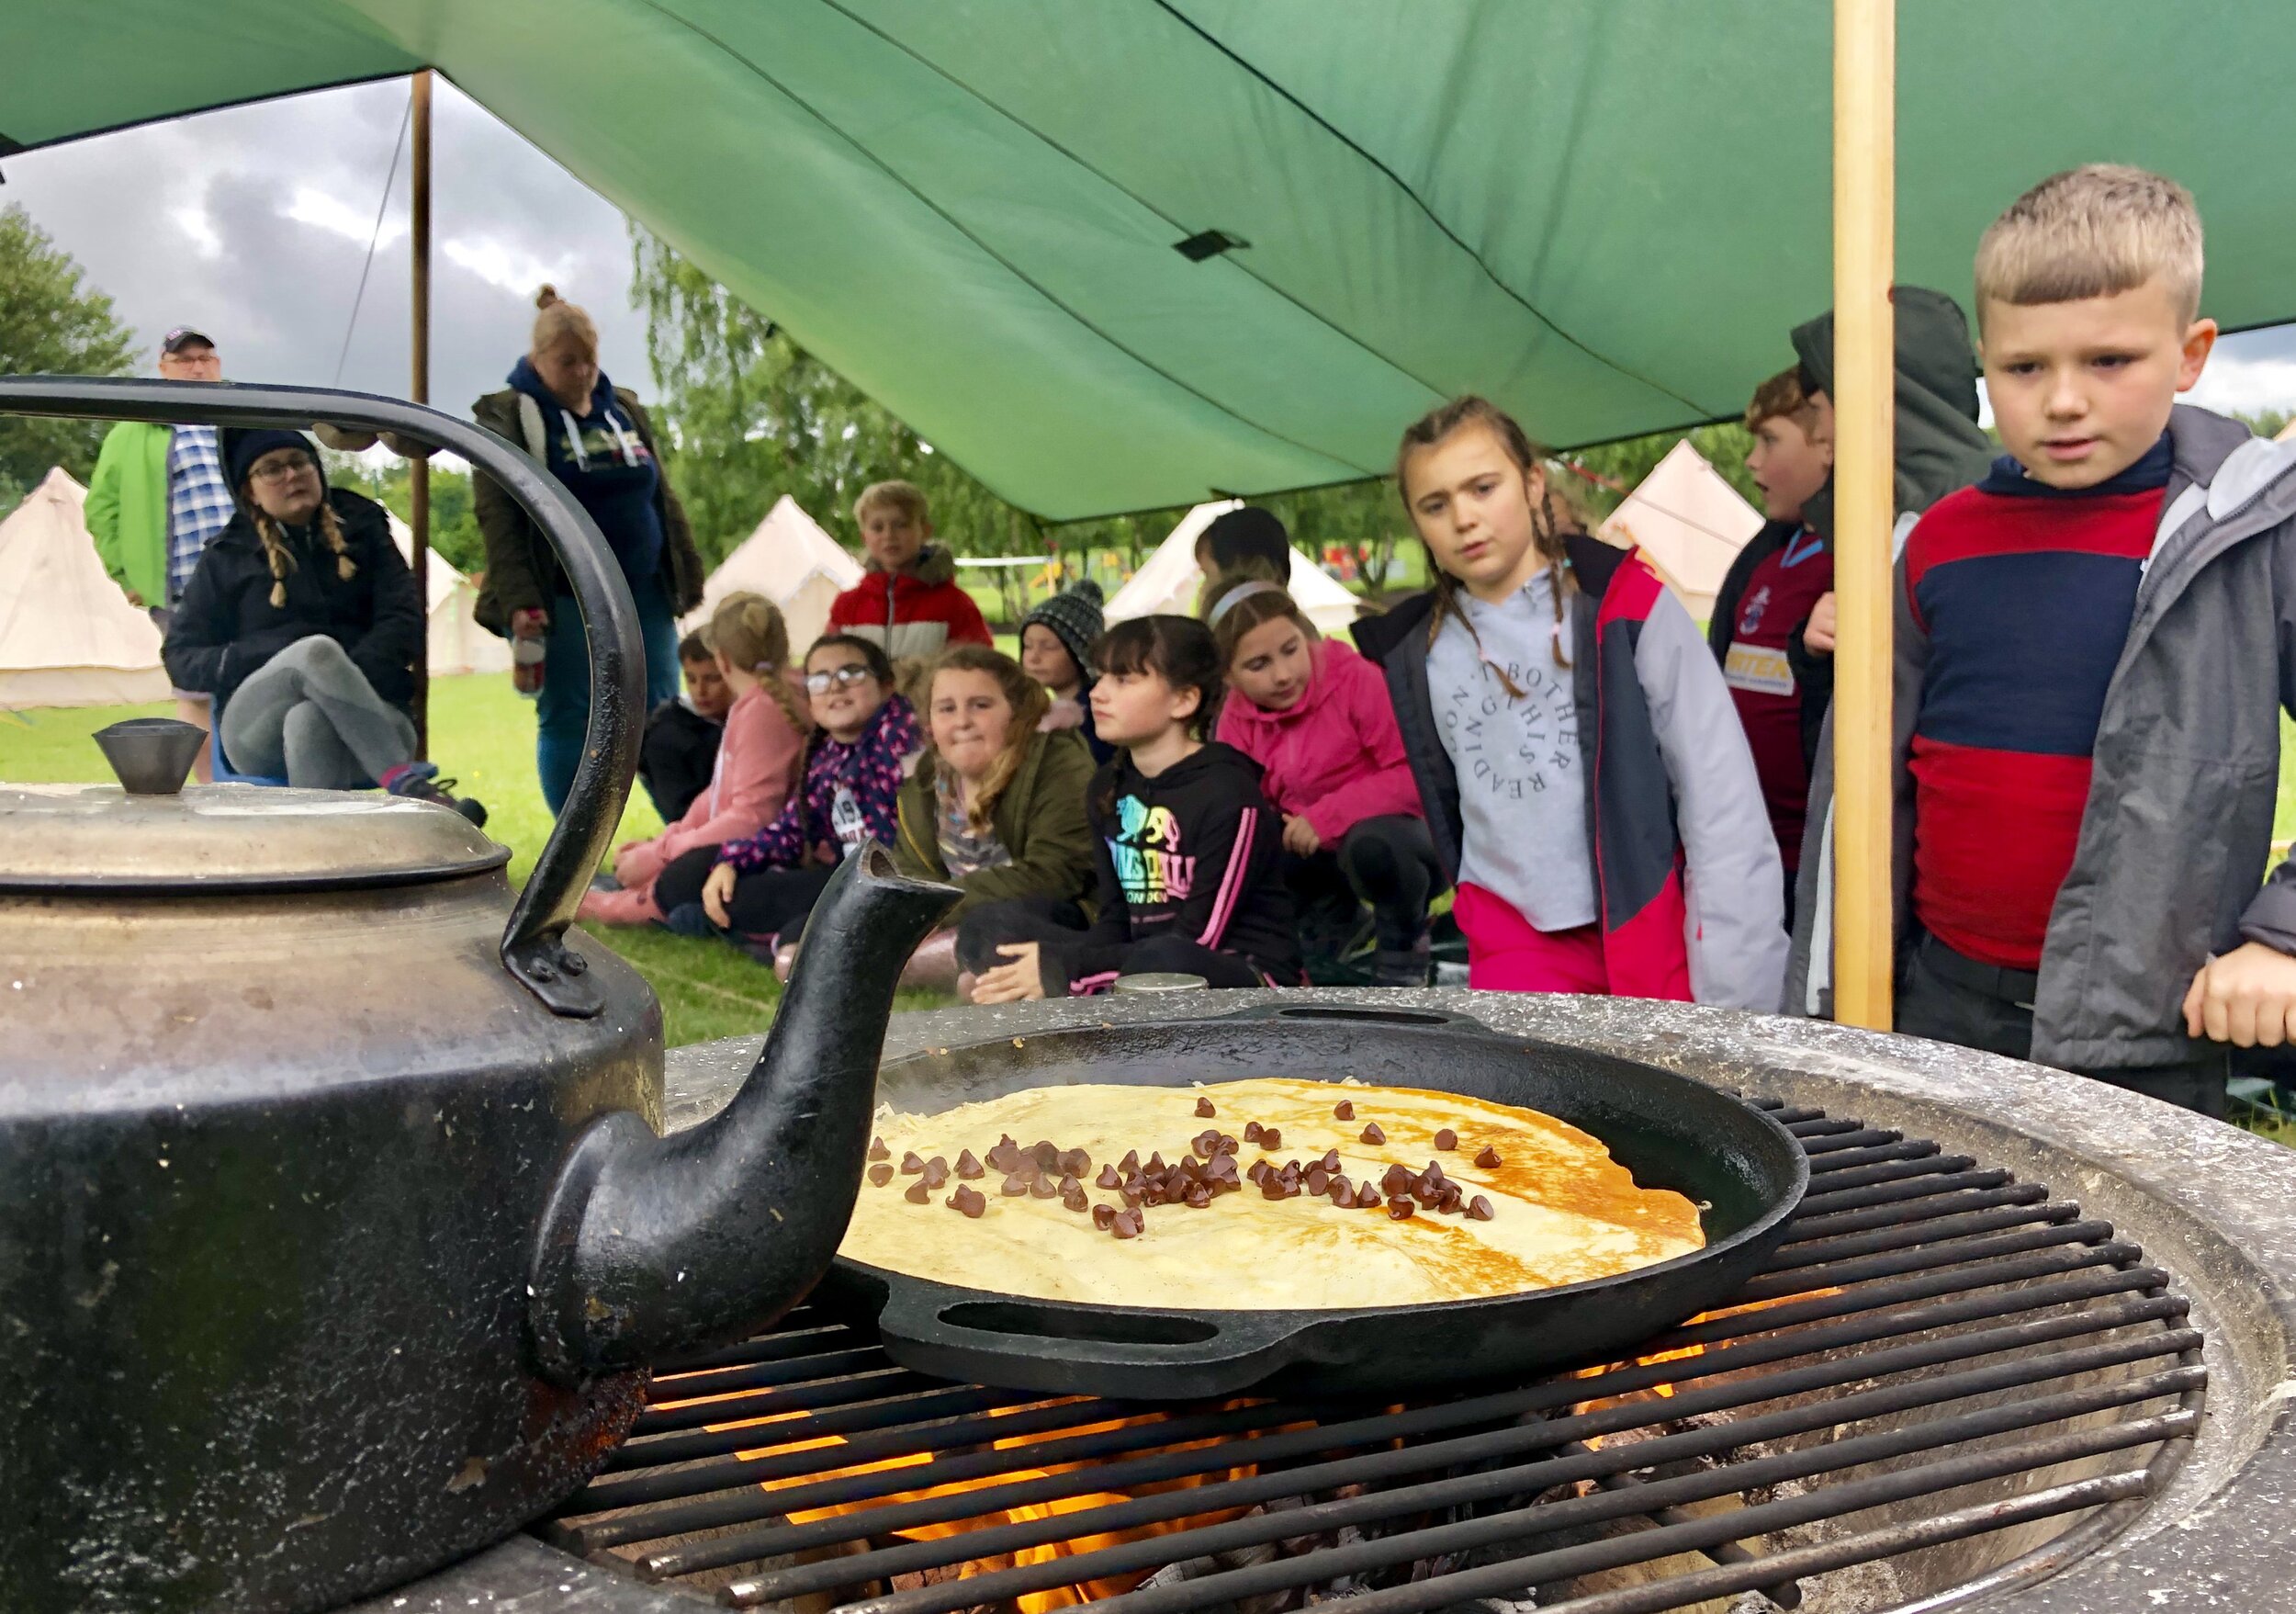
Learn basic and exciting cooking skills, including our super simple pancake recipe:
1 scoop of flour
1 scoop of milk powder
1 scoop of water
1 egg
Our “scoops” are around 140ml... or about the same as the little glass pots that "Gu" puddings come in! We're not affiliated with Gu, we just like chocolate!
Areas of learning that could be expanded upon in a classroom environment might include:
Food provenance
Learning more about the fire triangle
Learning more about carbon
Global food security
Population growth
Nutrition
Other cultures
Religious diets
Other simple cooking recipes, maybe even involving similar ingredients but combined differently. We purchase our edible insects from Crunchy Critters who are based in the East Midlands.
Eating Gu chocolate pots (probably teachers only!)
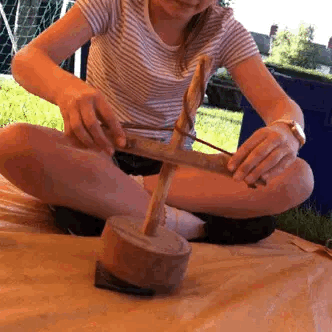
Using ancient tools, students will learn how to drill their own personalised stone Survival Pendant and braid a cord for it that doubles as a useful tool in emergencies!
KEY LEARNING OUTCOMES
A personalised stone Survival Pendant to keep
An understanding of pre-bronze age techniques for drilling and cord making
Perseverance and resilience
Teamwork and co-operation
Natural Navigation
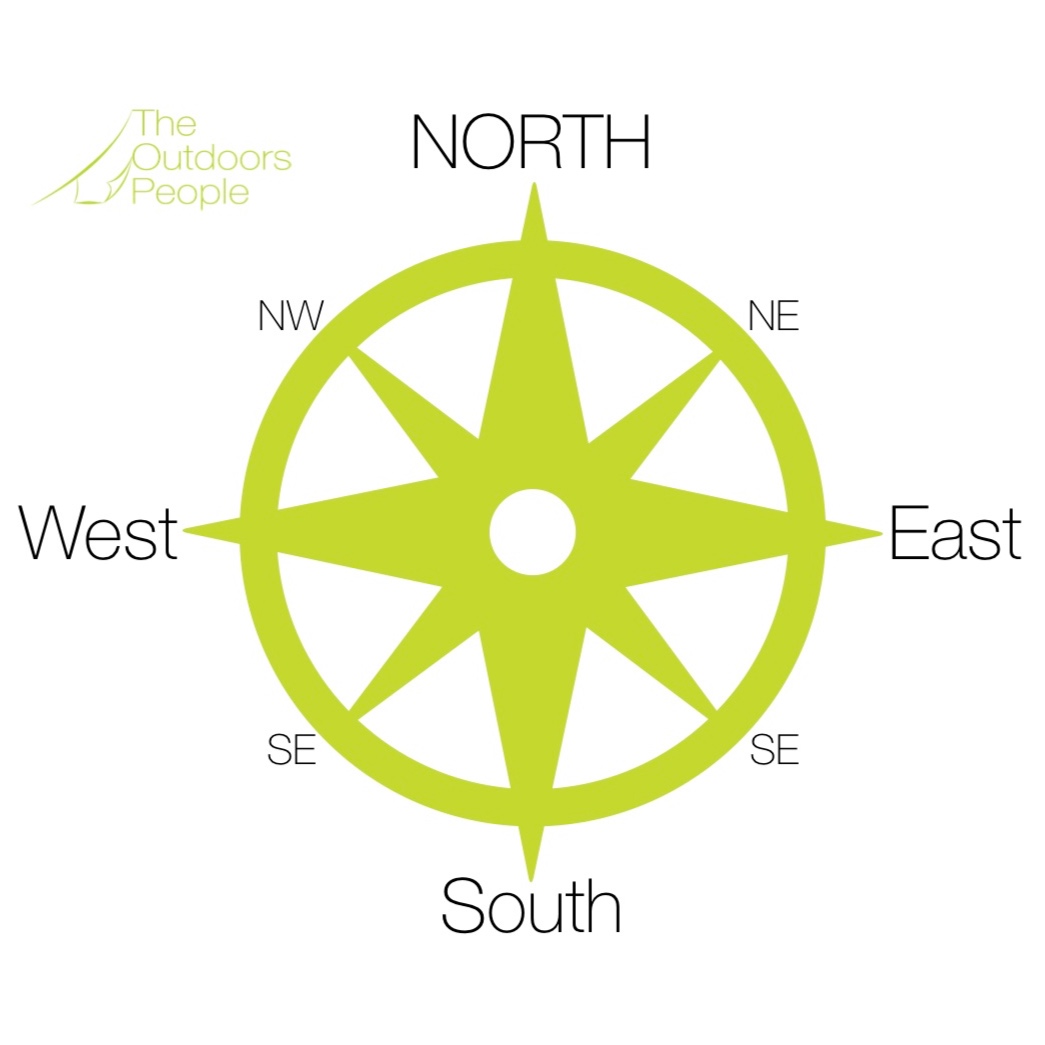
During this session, students learn the principles of navigation and run around a lot!
KEY LEARNING OUTCOMES
What is north?
How to find north using the sun, the stars, plants, and other methods
What is a compass?
Work together to build a functional magnetic compass
What is a map?
Learn the basics of map reading
Key stage 2 - this is a more academic activity than many of our sessions and is not suited to all groups


